Quick ScrollTo Code for jQuery

Scrolling to an element in jQuery

The Problem

I had been using a jQuery plugin to automatically scroll an element to the top of a container with success for quite a while. Then I changed my markup and the .ScrollTo() function began having strangely; specifically, scrolling my entire page to the top of the window then refusing to respond to further .ScrollTo() calls. After an hour of trying to figure out why and then trying an alternative plugin with the same results, I decided to try and see if I could just quick write what I needed.

It turned out to be surprisingly easy — actually only two lines of code — one if you really want to compact it further.

The Layout

The simple markup we are looking at is a container full of elements that we want to scroll to by clicking various buttons. So let’s say we have a container full of header-paragraph pairs representing short descriptions of planets in the solar system (content taken from wikipedia). We have a toolbar of buttons with the planet labels, and by clicking them, we want to scroll to the appropriate header. The markup would look something like this:


<div id="planets">
  <div id="mercury" class="button">Mercury</div>
  <div id="venus" class="button">Venus</div>
  <div id="earth" class="button">Earth</div>
</div>
<div id="content">
  <div id="planetWrapper"</div>
    <h2 id="content_mercury">Mercury</h2>
    <p>
    Mercury is the smallest and closest to the Sun of the eight planets in the Solar System, with an orbital period of about 88 Earth days.
    </p>
    <h2 id="content_venus">Venus</h2>
    <p>
    Venus is the second planet from the Sun, orbiting it every 224.7 Earth days.
    </p>
    <h2 id="content_earth">Earth</h2>
    <p>
    Earth is the third planet from the Sun, and the densest and fifth-largest of the eight planets in the Solar System.
    </p>
  </div>
</div>

The CSS

There’s only a couple of key elements that need to be in place:

  • The content element, being the “outer container” needs its position set to relative and its overflow-y property set to hidden
  • The planetWrapper element needs its position property set to absolute

The Scroll

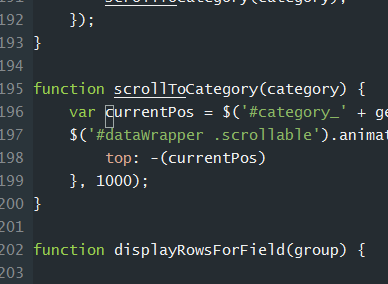
I won’t go into all the details here of reacting to the click events and such in jQuery. What I want to show you is the code that scrolls the planetWrapper to the correct element. Let’s call our function scrollToPlanet and it will accept one parameter, which is the planet’s H2 to scroll to. Therefore:


function scrollToPlanet(planetHeader) {
  currentPos = $(planetHeader).position().top;
  $(planetWrapper).animate({
    top: -(currentPos)
  }, 1000);
}

All we are doing here is noting the current position of the planet header we want to scroll to, then animating the entire planetWrapper element such that its top position moves up a negative amount equal to the header’s position. This effectively dispalys the header at the top of the container.

Adding jQuery to a Custom DotNetNuke Module

Step 1: Register jQuery

In the code behind for the page you will be making jQuery calls, register the library in the OnPreRender event:

protected override void OnPreRender(EventArgs e)
{
string moduleDir = this.TemplateSourceDirectory;
Page.ClientScript.RegisterClientScriptInclude("jQueryScripts", moduleDir + "/scripts/jquery-1.3.2.js");
Page.ClientScript.RegisterClientScriptInclude("jsUtilities", moduleDir + "/scripts/utilities.js");
}

The first line stores the path to the module’s folder. I stored the jQuery library in the module’s scripts folder, so the next line registers the library with a supplied key (your choice of name) and the path to the library.

The third line registers another javascript library, this time one of my own javascript files.

Step 2: Initialize jQuery

DNN has name conflict issues with jQuery so the following line is needed (thanks to Steve Johnson at Abstract Coder for this tidbit):

var $j = jQuery.noConflict();

I included this in my utilities.js file outside of any functions.

Step 3: Call jQuery Functions

It is important to note that all of your calls to jQuery functions will use this $j variable instead of the normal, single $ you will find documented just about everywhere.  So for example, the document ready function will look like this:

$j(document).ready(function() {
//your code here
});

Now you can write your normal javascript code and call jQuery functions throughout. Just remember to use the $j variable.

Step 4: Accessing Control IDs

This step is not specific to jQuery, but I wanted to include it because I found that many people, including myself, were having a hard time trying to figure out how to target controls with javascript. Consider the following ASP.NET control on a page:

<asp:textbox id="simpleTextBox" runat="server" />

When using this control server-side, say with C#.NET, you write things like:

string t = simpleTextBox.Text;

So, naturally, you’d think to access this control via javascript, you would write something like:

t = document.getElementById("simpleTextBox")

However, ASP.NET will prefix all of your controls with parent container IDs to avoid conflicts. Thus your ID of simpleTextBox will be converted to something like dnn_ctr459_EditMyModule_simpleTextbox. This doesn’t matter to your code as it stays server-side, but once it hits the client, your javascript code has no clue what simpleTextBox is anymore.

My solution is to specifically tell javascript what the new name of the control is (my thanks to steveradich’s post at aspdeveloper.net for nudging me in the right direction here).

1. Register the javascript event handler when the page loads

protected void Page_Load(object sender, EventArgs e)
{
simpleTextBox.Attributes.Add("onclick", "testFunction('" + simpleTextBox.ClientID + "')");
}

The key to this line of code is the ClientID property. We are sending our javascript code the new name of the control here.

2. Access the control from javascript

testFunction(cid) {
c = document.getElementById(cid);
}

Note here that we are using the same getElementById function, but now we are armed with the new ID of the control.

3. Target the control with jQuery

The following is an example of targeting the control using jQuery syntax:

$j('#' + cid).slideDown('normal');

*Note: I used this solution with my current installation of DNN, which
is 4.9. Version 5.0 has native jQuery support, which may change some of
these steps.