My First Minecraft Model

I’ve recently been sucked into the world of Minecraft and am really enjoying the open-ended nature of the experience. Being a Minecraft newbie I’ve been absorbing all kinds of information from survival tips to creating complex redstone circuits. Another thing that’s really grabbed my attention is the ability to create really cool architecture and scenes out of the simple blocks provided.

Minecraft McDonald's

So here is my first attempt at a focused building effort within Minecraft. It is based on the Whitmore Lake McDonald’s in Michigan that I’ve stopped at a couple of times and really think the layout is aesthetically pleasing.

Entrance

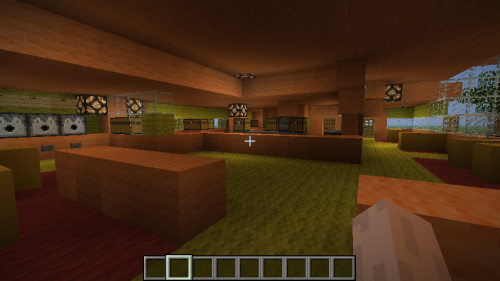
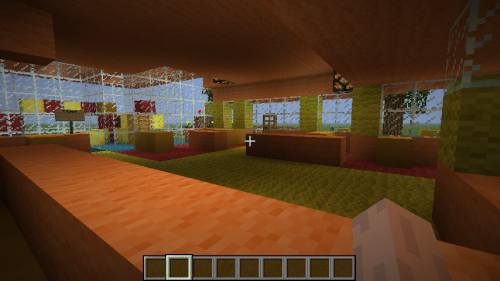
This is the view as you enter the front door. The drink station is on the left, counter straight ahead and playland to the right. The drink station contains three dispensers that dispense empty buckets, buckets of water and buckets of milk.

Playland

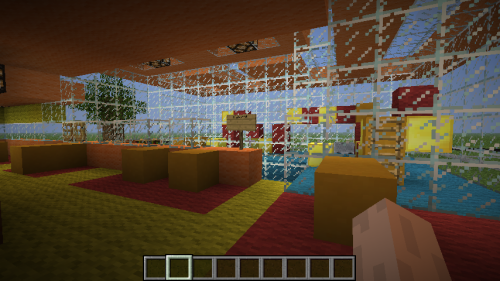
Looking toward the playland you can see some blocks to climb on and there’s also a short minecart route to ride around on. There are also tables a step down into the playland area as well as a couple of tables inside the playland.

DriveThru

Looking back toward the drink station you can also see the McCafe station (full of buckets of lava) and the two drive-thru windows.

Kitchen

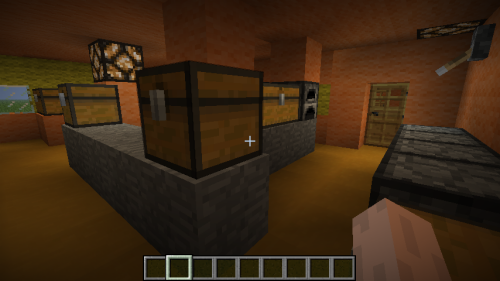
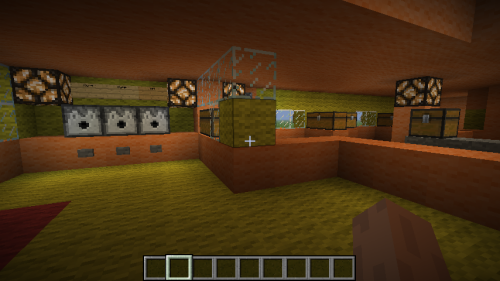
Into the kitchen we see several furnaces. Coal is stocked in the chests on the floor. The chests in the prep area contain raw meat and bread. The chests in the front contain cooked meat, bread, baked potatoes and apples. Raw potatoes are stocked at the fry station over by the drive-thru.

From the counter

This is just a shot from behind the counter looking toward the front of the restaurant.

Back seating

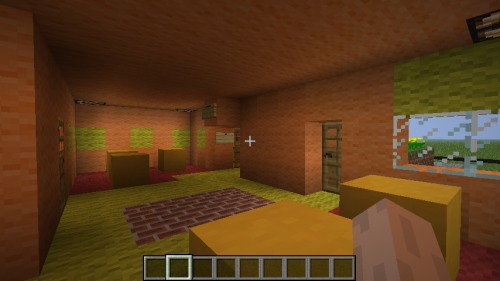
Here is the back of the restaurant. An employee entrance to the kitchen is on our left, another employee door out the back of the building to the right and the restrooms are in the back corner. I’m not sure what to do yet with that little brick area.

Nighttime

And finally, I’ll leave you with a view of the restaurant at sunset.

Happy Birthday Ludwig Mies van der Rohe

Seeing Google’s doodle today, honoring Ludwig Mies van der Rohe’s birthday, reminded me that several years ago I was playing around with a desktop package called Visual Reality. I’ve always admired the clean lines and simplicity of his work, so I used the application to loosely recreate the basics of the Seagram Building found in New York City.

Seagram Building Overview
Seagram Building Facade
Seagram Building Lobby

Mindscape in LEGO

While shopping the LEGO website the other day, I ran across a free application they provide called LEGO Digital Designer. With it, you can assemble bricks from the included palette, then package and upload your creation back to the site. This looked pretty fun so I gave the software a whirl.

Now, I am not a professional 3D modeler, but I do have experience in a few tools, such as Blender, and expect a few necessities in a 3D modeling application. LEGO Digital Designer does not have them. But that’s OK, I thought. I’ll just play around with it.

For an experiment, I decided to model the building I work in, 25 Ottawa SW, Grand Rapids, MI, the home of Mindscape at Hanon McKendry. My goal was to capture the feel of the building (being that it is LEGO and not a precise, 3D replica) without getting into too much detail. Well, that’s hard for me to do, and before too long, I found myself agonizing over placing bricks exactly where they should be to accurately reflect the building’s layout. Then I would take a step back, take a deep breath, and remind myself that I’m just capturing the building’s essence. Then it would get fun again.

However, the application does have a lot of shortcomings, and as soon as the brick count started rising, I found it more and more difficult to place bricks, even in seemingly simple scenarios. Time to put this together started skyrocketing and I decided to call it quits for now before this turns into a lifelong project. I may have to look into other tools such as LDraw and see what they have to offer.

That being said, this is where the model stands right now, at 4,368 bricks. This view is from the Southeast (you can click the pictures to see the full-size view).

25 Ottawa SW, Grand Rapids, MI

Here is a view from the Northeast.

25 Ottawa from the Northeast

As you can see, it captures the building’s essence on a basic level. Here are a few more detailed views.

In this view, we’ve zoomed in to look through the first floor to see the Mindscapers hard at work in “the pit”. If you look through the small window on the right, you can even see the bearded Matt, hard at work on a website.

"The Pit" at Mindscape

Here we are taking a bird’s eye view through the roof. You can see the entire “pit” on the first floor, and several other items under construction. The stairwell and elevator shafts are positioned, and the Skywalk has been run through the building and ready to be connected to the adjacent buildings.

Bird's Eye View
Bird's Eye View

It would be nice to finish this, especially to add in the rest of Mindscape and Hanon McKendry on the sixth floor, and to build out 25 Kitchen on the first floor. But I think I’m going to need a new tool. Of course it would be nice to build it out of real LEGO, but I would probably have to win the lottery to buy 5,000+ bricks. Has anyone out there had experience with any other digital LEGO tools?

Virtual Coca-Cola for Your Virtual Thirst

Back in 2007, Coca-Cola held a contest to see who could design the best virtual Coca-Cola machine for their corporate presence in the world of Second Life. I had only dabbled in that world, but I’m a Coca-Cola addict and I thought it was a fun idea.

Coke wanted entries to capture the essence of the brand: refreshment, joy, unity and experience. So I set to brainstorming for a machine that would encompass those ideals. Using RayDream3D (I hadn’t used Blender much yet) and Paint Shop Pro, I created a storyboard to convey my vision.

Coke scene 01
Approaching the Coke machine
Coke scene 02
Make a gesture to activate
Coke scene 03
The Coca-Cola sign illuminates
Coke scene 04
Bottle dispenses a wide spray dome
Coke scene 05
Projectors extend around bottle
Coke scene 06
World map is projected onto spray dome
Coke scene 07
Bubble dispensers extend and activate
Coke scene 08
Player points finger through a country on the dome
Coke scene 09
Projectors overlay flag of activated country on dome
Coke scene 10
Individual bubbles show scenes from selected country
Coke scene 11
Player selects another country
Coke scene 12
Flag of newly selected country is projected onto dome
Coke scene 13
Bubbles now show scenes from both countries

Future World Directional Sign in Blender

I was in the mood to model with Blender today, so I recreated a typical directional sign found in Future World at EPCOT. What I find interesting about this excercise is that the entire model is basically made out of primitives (cylinders, cubes, etc.) But when put together, the design looks really cool, thanks to the brilliant Disney Imagineers.

Future World Directional Sign

There are a few techniques worth mentioning, however. Refer to the figure below.

Slicing an Object
Slicing an Object

The outer frame is a cylinder, that was simply extruded around a corner. One end of the cylinder was rotated 45 degrees around the Y-axis, then extruded down the Z-axis.

The lattice work is made up of elongated cubes. All of them originally overhung the outer frame. I couldn’t find any kind of “slicing” operation, so I created another elongated cube to act as my slicing object. I positioned it where I wanted the slice to occur, then performed a Boolean Difference operation with each piece of lattice.

The outer cylinders, that will eventually hold the arrows that point to the associated attractions, are actually made up of three cylinders. I began with the first cylinder and deleted its end faces, so I basically just had a hollow ring. I duplicated the ring, then scaled it down to make an inner ring. On each end of this dual cylinder, I made faces between the inner and outer rings. I then created a third cylinder, kept its faces intact, and scaled it to fit inside the inner ring.

Curves and DupliVerts in Blender

The next step for my EPCOT scene was a curved guardrail. I knew I was going to have to get a grasp of two main concepts: extruding along a path and duplicating objects along a path.

EPCOT West - Bench with Umbrella and Rail

The top and bottom of the guardrail, as well as the ends, involved extruding a circular cross section along a path. For the top and bottom, I drew a Bezier curve to the desired shape. I then drew a Bezier circle to act as the cross section. Then I simply selected the curve and told it to use the circle as its bevel shape. For the ends, I created a path and adjusted its vertices to the desired shape. Again, I created a circle to act as the cross section, selected the path and told it to use the circle for its bevel shape. Why did I use a path instead of a Bezier curve for the ends? I’m not sure. I think at the time I was unsure how to add more control points to the curve, and a path comes with five control points as default. This allowed me to bend the ends 90 degrees to meet up with the rails.

The posts are made up of simple cylinders. Obviously I only wanted to create one cylinder and have it duplicated along the rail. So the first thing I did was to duplicate the rail curve to act as a path for the posts to follow. I then converted the curve to a mesh object and subdivided it a few times until I had the desired number of vertices. I created one post and made the new mesh its parent. I then selected DupliVert, and I had a path full of posts.

Back in the Blender

I had the urge over the last week to play some more with Blender. After brushing up on the excellent tutorial “Blender 3D: Noob to Pro”, found at http://en.wikibooks.org/wiki/Blender_3D:_Noob_to_Pro, I was back at it. I began by creating a couple of simple models, shown here — a bench and an umbrella, as found at EPCOT: Future World West.

EPCOT West - Bench and Umbrella

I’ve once again been delighted with the elegance of Blender. Although intimidating at first, once you get the hang of the basic controls, you’ll wish more applications were like this.