After playing Minecraft for a bit I started venturing into the world of mods for more variety and new adventures. The one thing that immediately started annoying me though was that I wasn’t yet sure how the mod system worked, how the files were organized and how I could keep separate versions of Minecraft installed on the same machine. The result was my single installation of Minecraft getting all mucked up with different mods and generally watching everything go haywire.
What if I just wanted to play the latest Minecraft version with no mods? What if I just wanted to play a single-mod version or a certain combination of mods only (e.g. Computercraft and OptiFine)? I needed to get a handle on how this all worked so I could keep my sanity. And the solution is really quite simple.
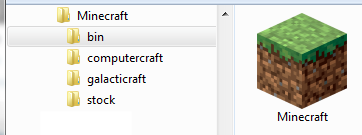
First, create a directory anywhere on your machine. For this example, we’ll just call it c:\minecraft. Within this folder create a bin folder and any other folders you wish to create that will hold your separate versions (or mod combos, or instances, or whatever you want to call them) of Minecraft. For example:
Take your Minecraft.exe file (the one you downloaded from Minecraft.net) and copy it to your c:\minecraft\bin folder.
Now let’s work on our Computercraft version of Minecraft. Within the c:\minecraft\computercraft folder, create a folder named data and a file named minecraft.bat.
Edit your minecraft.bat file to look like the following (Thanks to this post at stack exchange which helped me a lot and started me on the path to seeing the light: http://gaming.stackexchange.com/questions/29272/how-do-i-keep-two-different-versions-of-minecraft-installed):
set LAUNCHER=c:\minecraft\bin\minecraft.exe
set APPDATA=c:\minecraft\computercraft\data
%LAUNCHER%
As you can see, this is just telling Minecraft where the launcher is and the game directory we want to use. This is key. Without this bat file, Minecraft just assumes you will be playing inside the default folder, usually located at something like AppData/Roaming/.minecraft.
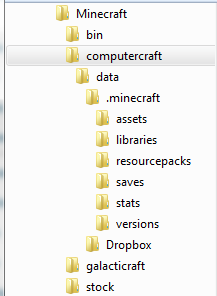
Double-click your minecraft.bat file to launch Minecraft. We need to do this first so Minecraft will setup the appropriate files and folders. The Minecraft launcher will recognize this as a new instance, so log in as normal. You will also need to click the Play button as this will finish the default Minecraft setup. You can then close Minecraft. Your folder structure now looks like this:
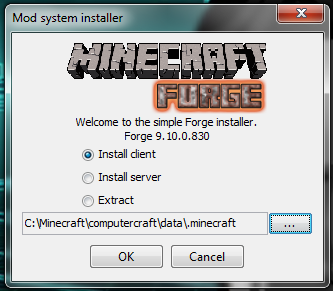
As you might expect, if you play this now, you will be playing a stock version of Minecraft. But we want to play Computercraft, so let’s get that setup. Computercraft needs the Minecraft Forge utility to run so we will set that up first. Get Forge and run it’s installer. We want to select “Install client” and then it asks you to specify the .minecraft folder to install Forge against. In this case, we want to use our c:\minecraft\computercraft\data\.minecraft folder.
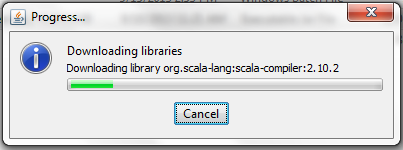
Click OK. Forge will then download some libraries and let you know when it is complete. A couple of things to note here. First, Forge may tell you that you need to run a certain version of Minecraft before it can install. In my case, Forge wanted me to run version 1.6.2 before it could install. I was confused until I realized that my profile was set to “Run latest version”, which as of this writing is 1.6.4. I simply set my profile to Run 1.6.2, clicked Play, then Quit then Forge installed normally. Secondly, I’ve noticed that sometimes the “downloading libraries” step hangs. If after a minute or so you think it is hanging, just abort the installation and try it again. Every time this has happened to me, a reinstall fixes the problem.
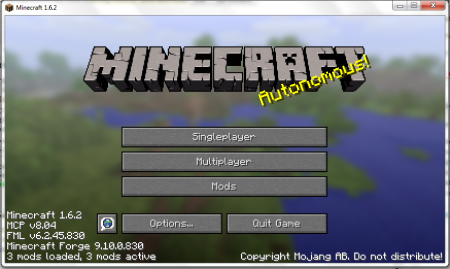
Running your minecraft.bat file now gives you a Forge profile in your launcher. Selecting the Forge profile then confirming your existing user or logging in as a different one, then clicking Play will complete the Forge installation. The Minecraft start screen should look something like this:
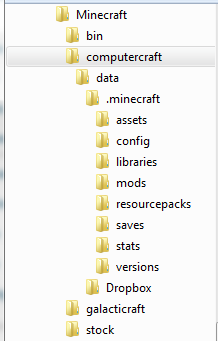
And your folder structure should look something like this (notice the new mods folder):
OK, great! The hard part is done. Quit the game once more. Get yourself a copy of computercraft and simply drop the zip file into your mods folder.
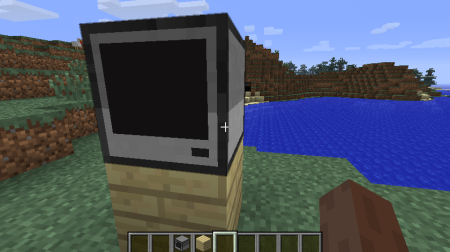
Run your minecraft.bat. You are now playing Minecraft with the Computercraft mod installed. You can continue to add other mods as well that are compatible with Forge. For example, I dropped the OptiFine mod into the mods folder so I’m running Computercraft and OptiFine at the same time.
So as you can see, this is a great way to keep your Minecraft installations and mods organized. You can play around with new mods and resource packs and worlds or whatever without worrying that your other setups are getting messed up.
