I have been working on migrating a client from PayPal’s Website Payments Standard to Website Payments Pro, so they could begin handling purchases on their own website. PayPal and their corresponding developer network at http://www.x.com are loaded with documentation on how to use their APIs and test your code in the sandbox, before going live.
While this wealth of documentation is certainly welcome, their seems to be no clear path on which APIs you are to use in certain situations and how you are supposed to configure your code, depending on the PayPal plan you are currently under. As an example, I was referencing the wrong API documentation, well within my project, before I came across a forum post that said my code would not work unless I signed up for a more expensive plan that included access to that API.
Specifically, I was setting up my client to handle recurring payments using the Website Payments Pro plan. After a semmingly endless number of errors and wrong turns (no thanks to the confusing documentation), I finally received a successful response after transmitting a test transaction. With that, I would like to share here, the steps necessary to make this happen. I will not walk you through EVERY step, but point out the major steps and pitfalls that are not necessarily covered in the documentation.
1. Login to your developer account at http://developer.paypal.com
2. Create a Website Payments Pro account

3. Click the “Sign Up” button on the next page
4. Enter business information on the next page. Here are some key entries that you are unaware of unless you dig. Thanks to this document at https://www.x.com/docs/DOC-1603 for these tips
- For the social security number, enter 111-NN-NNNN where N is a random number. Do not use all 1s
- Select “Individual” for ownership type, “Arts, crafts, and collectibles” for business and “Antiques” for business subcategory
5. Select both fraud protection and recurring payments on the product selection page.
6. For the credit card information, you wall want to note the generated credit card number for later use. Select an expiration date in the future and 123 as the security code.
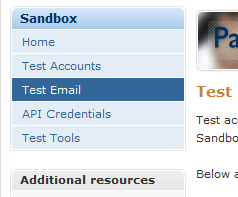
7. Confirm your email by checking your test account’s inbox (located on your developer.paypal.com page)

8. In your test account, click the “Get Verified” link and setup your bank by entering a fake bank name. When asked to confirm by entering two deposit amounts, enter a random amount between .01 and .99.
Your test account is now setup. Here are two other items to note.
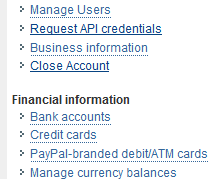
1. When you begin making calls to the PayPal API, you will need to pass in your API credentials. To get these credentials, login to your test account and click the Profile tab. Click the “Request API Credentials” link. Select Option 1 – PayPal API, Setup API credentials. Select View API Certificate. Your API username, password and signature will then be displayed.
2. The documentation gives you a bunch of test credit card numbers to use, such as 4111111111111111 for Visa. They don’t work. Instead, login to your developer account and click the “Credit Cards” link under your Profile. Add a new card and note the number, expiration date and security code.

I hope this helps some of you PayPal developers out there.